Recently my partner and I have been looking for a home near where we live that we can transform into a regenerative paradise.
Looking for land anywhere is a long and tricky process, especially because we have very specific criteria for what we want and need.
As we’ve been looking around I’ve been making a ton of maps to get a better understanding of the places we’re looking at.
It used to be that making maps was one of the most time consuming parts about designing a land based project.
Now there are some really powerful and simple tools available for free that make it quick and painless to design a pretty high quality overhead map in no time.
Since I’ve been doing this a lot lately I thought I’d share my process with you so you can make your own maps for whatever you might want to design.
Making a base map of your site is one of the most important resources for building your regenerative design.
Whether you’re following permaculture principles, designing a natural building, or planning a holistic grazing plan, knowing the perimeter and major features of your land is a fundamental place to start.
That’s why I’ve been working with a buddy of mine, Tobi Kellner, to create a step by step guide on how to easily make your own digital base map using free programs online.
All you need is a Google account and an internet connection to get started.
With these steps you’ll be able to make an accurate map of any place in the world.
Once you have a good base map to work from, it will also be much easier to make crucial decisions in your design and this format will also allow you to add other layers and even share the map without having to download anything. It doesn’t get much easier than this.
So let’s get started.
- The first step is to open Google Earth Online and click “Launch Earth” in the top right corner

- sign into your account by clicking on the three horizontal bars in the top left

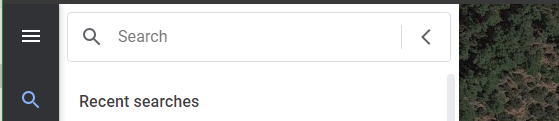
- Find your location by entering your town in the search icon or by zooming around the globe until you have your site on the screen (with very large land, or camps with complex boundary lines, it may be necessary to zoom in more, but having everything in view on one screen makes it easiest)
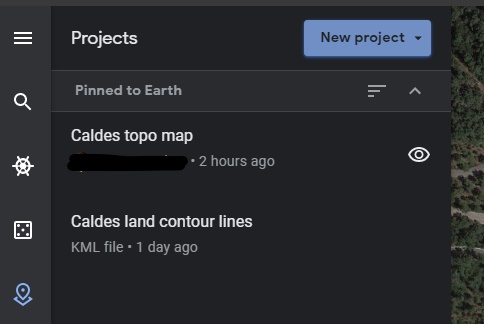
- Start a new project by selecting the “Projects” icon in the right hand bar and clicking “New Project”
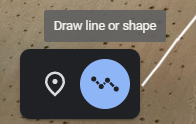
- Next, click on the “Draw line or shape” button in the lower left corner
- Trace the outline of your land, clicking on the borders to draw a polygon with the outlines of the camp

- Click on the first point where you started from to close the shape, or leave it open if you just wanted to make a line or path.
- Give a title for the shape or line and make sure the right project is selected, e.g. “Land border” or “My secret refuge of regenerative bliss”
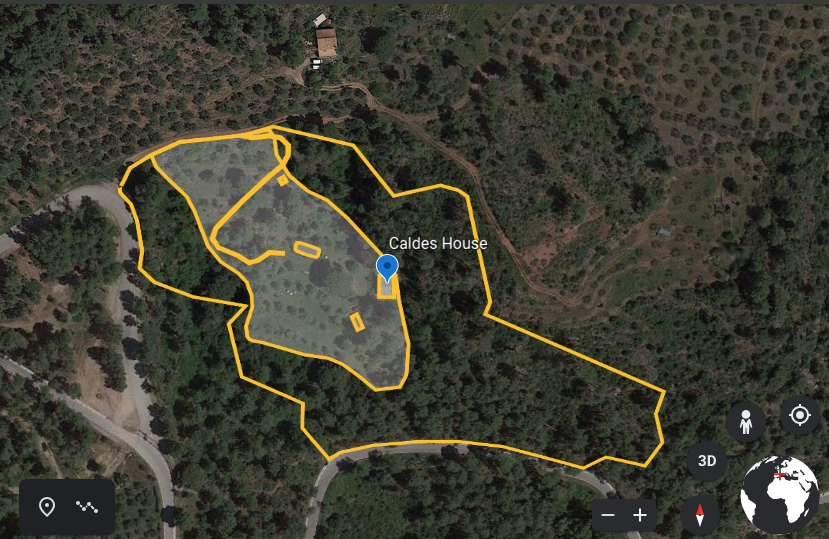
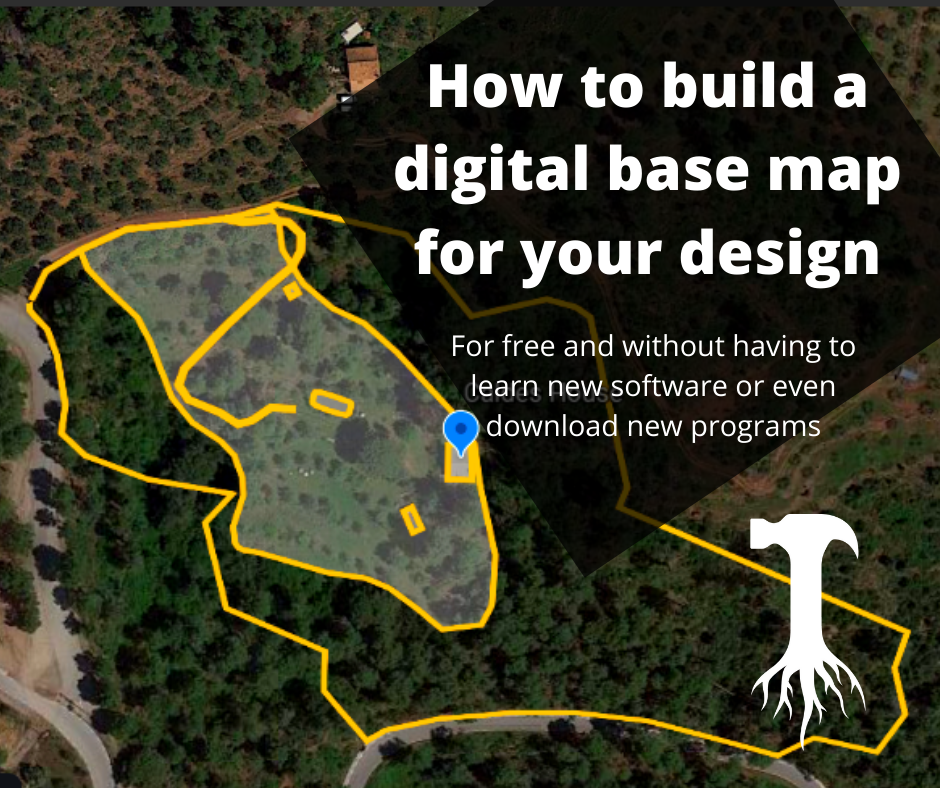
- I drew in the outer perimeter of the land as you can see here
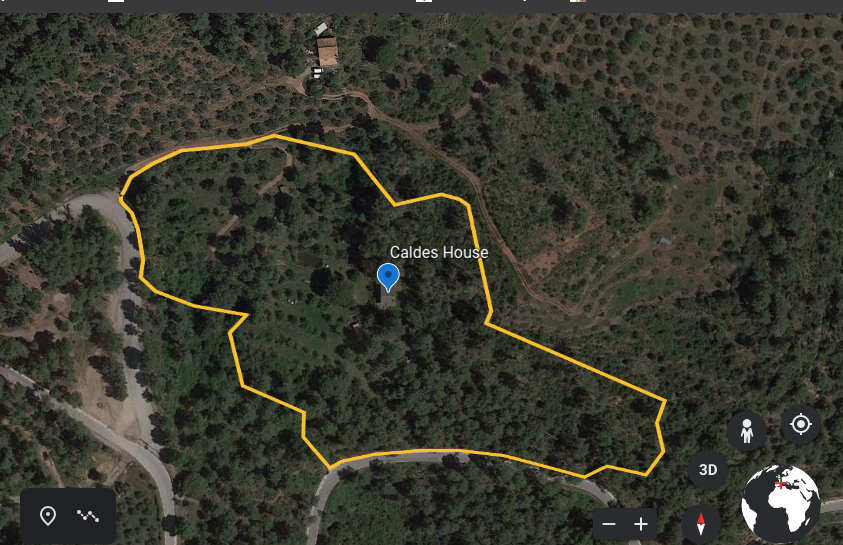
- I also created a shape for the part of the land that is allowed to be built on
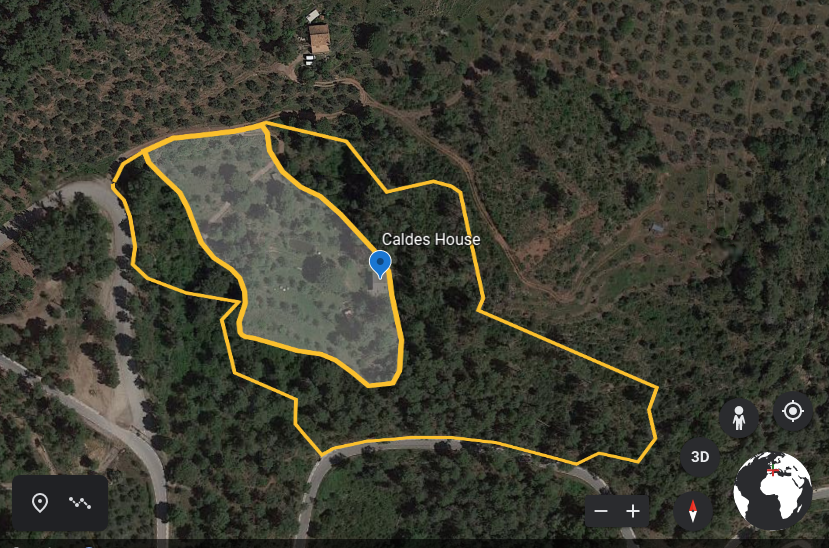
- And finally, I traced the buildings, the access road, and the irrigation pond to indicate the main features on the site
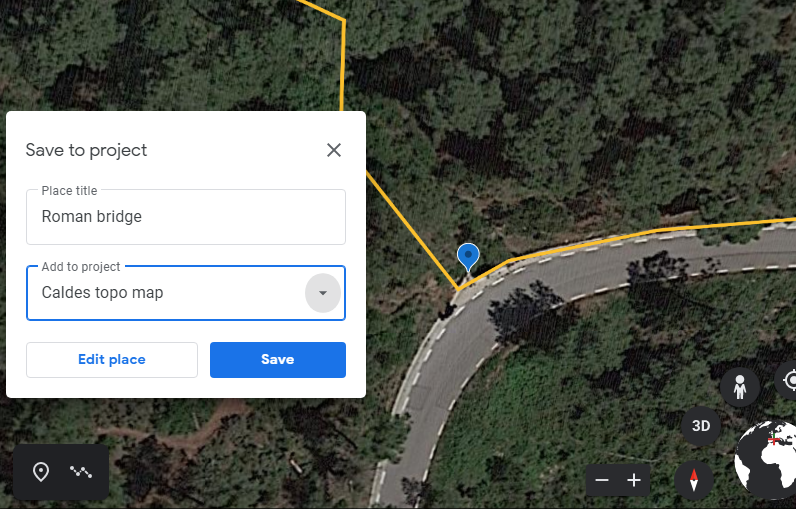
- To add points of interest within the project, click the “Add Placemark” icon
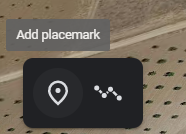
and then click on where you want to create the placemark. Enter a place title, and make sure the correct project is selected in the “Add to project” bar before your save
- If you want to save a version of this map on your computer to access when you’re offline, click on the three-dot symbol in the top right of your menu bar

- Click on “Export as KML” file.

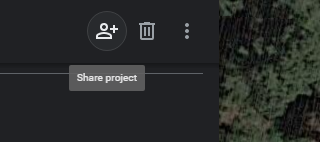
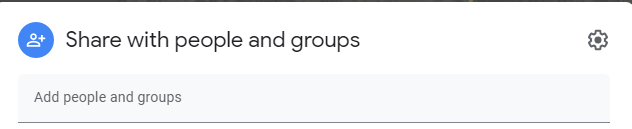
Your browser will download a Google KML file. You can now save this file and send it to anyone via email. - You can also share your project directly by clicking the icon to the left of the trash can which will allow you to share it directly with people from your email contacts
There you have it. You’ve created a digital base map of your site and you didn’t have to download any bulky software or spend days learning a new program just to get the basics. If you want to import a free topographic map to this base map and be able to toggle it on and off as you need, click here to see the instructions on how to do that.
Combining maps over different layers can make the design process really easy and save you a whole lot of time.
If you liked this tutorial and would like to get more regenerative skills directly to your inbox, consider signing up for our skill sharing newsletter.
You can also share your progress, ask questions and much more in our dedicated Facebook group all about regenerative skills. The links to both resources are below.
Tagged as: digital mapping.


Post comments
This post currently has no comments.