Soil testing is a task that seems daunting to many people who are new to earth restoration projects or even folks who want to start a garden. Maybe you’ve read that you need to take samples with special equipment and kits, or you have to send your results to an expensive lab to get accurate results. The truth is that the most important information you need about your soils can be learned within a few minutes and with a couple common tools, so let’s start by deciding our objective.
In this article I’ll cover how to find out three main things about the soil on your site. The depth of your topsoil, the approximate ratios of clay and aggregate in your subsoil and the texture of your soils which is important for a lot of things including:
Knowing the suitability for growing all sorts of plants and food
How well your soil will hold water and nutrients
Whether or not your soil could be good for earthen construction projects
Whether or not your soil needs certain amendments before planting or use in building
The first test is the simplest. To see how deep your topsoil layer is, all you need is a shovel and a tape measure.
Grab a shovel and dig a small hole. In most places you won’t have to dig very far before the soil changes color and you stop finding the little hairy roots of small plants like grasses and weeds.
Clean out the hole as best you can by removing all the loose soil and scraping the sides until they’re fairly smooth and go straight down.
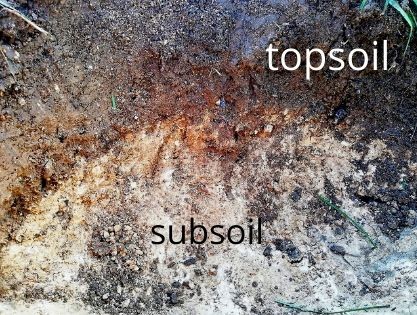
Your topsoil is the layer that tends to be darker and has the most thin roots in it. Look for where this layer stops and gives way to another color of earth, usually lighter and with little to no root mass or organic matter in it. If you can see a clear line that separates the layers then measure from the surface to the line of change to get a good estimate of how deep your topsoil is.
the soil profile at my neighbor’s place where I garden
If there’s a gradual gradient of change, look for where most of the roots stop to get a decent idea of the depth.
If there’s no visual or texture change in your soil you either need to dig deeper or, if there’s really no plant life or organic matter on the top of your soil, then you might not have any real topsoil at all.
If your topsoil layer is non-existent or very shallow you can start to amend it by adding broken down organic matter in the form of compost, or stack layers of organic matter on top to let them decompose in place. Planting hardy native plants on the site will also build topsoil for you. Look for plants that grow nearby in conditions similar to those on your site to get started.
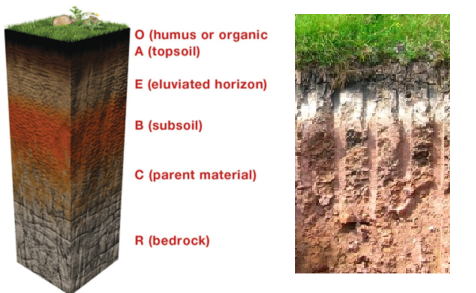
image from thefactfactor.com
Organic matter is essential for soil health, supporting the microorganisms that make nutrients in the earth available to plants, holding moisture in the ground and so much more.
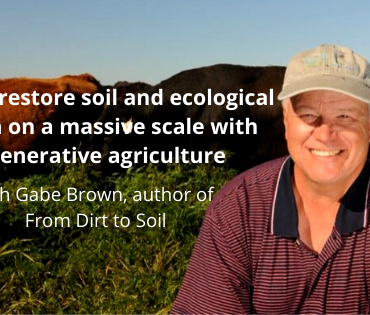
To learn more about how you can build soil health on a massive scale check out this inspiring example from a podcast interview I recorded with Gabe Brown
The jar test is a great way to learn the approximate ratios of sand, silt, and clay in your soil and will even give an indication of organic matter too.
All you need to get started is a shovel, a transparent glass jar with a lid, and some water.
Fill your jar half way with soil (soil from near the surface if you’re testing topsoil, soil from deeper down if you’re testing your subsoil), then fill the rest of the jar up to 2/3rds of the way with water.
Shake the jar really well until your soil sample is fully suspended in the water and any big or sticky clumps are broken up and dissolved
Leave the jar on a level surface to settle and after just a minute you’ll start to see your first results.
The largest aggregate like pebbles, little stones and coarse sand will settle to the bottom first
After minutes the silt will settle, hopefully creating a noticeable line of difference above the sand layer below.
The clay layer could settle out in 15-20 minutes or take 24 hrs to fall. It depends on what type of clay you have, but you’ll know it’s done when the water is clear. If the water is still cloudy after a full day then just do your best to mark out where the last layer lines are anyway.
Any material floating on top of the water or particulate matter that settled on top of the clay is organic material
Mark a line on the side of the jar with a marker or a piece of tape where you see a separation between the three layers.
Measure the distance between the lines you marked with a tape measure and write these numbers down.
This video is a great demonstration from one of my natural building heroes Sigi Koko on how to test your soil both with your hands and with the jar
If you want to figure out the percentages of each layer in your soil and forgot how to calculate it (don’t feel bad, I had to look it up again the first time too), here’s a link to break it down for you.
The biggest challenge with the jar test is telling the difference between silt and clay. Both are very smooth, soft, almost silky, but only clay really sticks. While this test is a good way to get an idea of the proportions of each material in your subsoil, I prefer to use the touch and form tests when deciding whether or not a test soil is good for different earthen building applications. While the ratio of clay to sand is important, whether or not the clay is sticky enough to bind the material, and if it will crack significantly when it’s dry are two factors that the jar test can’t tell you and so I like to rely more on touch when assessing potential building soil.
To make some simple touch tests all you need is a shovel, some water, and your bare hands!
Start by wetting a handful of the subsoil on your site (don’t use topsoil, it’s much better for growing and the organic matter will break down and rot in a building). Wet the dirt by kneading it in your hand until it’s uniformly hydrated and you don’t have dry crumbly patches or runny dripping mud. If the moist soil feels sticky and continues to stick to your hand without falling out when you turn it upside-down, that’s a great indicator that the soil has a decent clay content.
Get a small hand-full of your damp soil sample
Roll the soil into a snake/ worm
Let part of your mud worm hang off the side of your hand. If it curves and stays connected without splitting and falling off, this is another good indicator of strong clay content.
Once you confirm if your soil might be suitable for building or not you can test it more thoroughly by making test bricks or test plaster patches.
It’s also very important to test multiple soil sites on your land because the clay and other mineral content can differ significantly only a few feet away. Rather than simply digging systematically every few meters from each test site, there are many different signals you can look for that indicate where clay soil might be found before you ever start digging. Look for places on the land where water tends to pool. Water doesn’t pass through clay very easily and standing water is a good indication that there is a clay vein underneath. In every bio-region there are also plants that thrive in clay soils and high water tables. Research what these plants are in your area and look to see if you can find them on your land. Indicators such as these could save you a lot of unnecessary time and digging when looking for subsoil suitable for earthen walls.
Skunk Cabbage loves high water tables which indicate clay soil bellow
Cedar trees usually have shallow root systems and are water lovers. A good indicator of clay subsoils
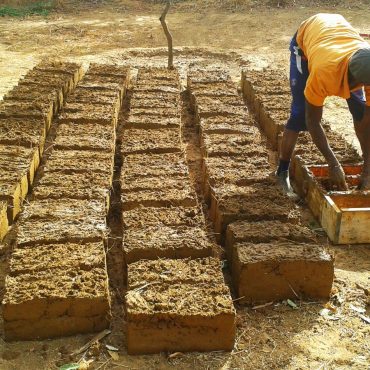
If you are still unable to find any clay soil on your land there are many places you could search. Often times when roads are installed or cut into the side of a hill, the process of construction will expose heavy clay soil that would otherwise be inconvenient to excavate yourself. Many times you can speak directly with your local municipality to ask if there are any land alteration projects going on such as road leveling, or site grading for another construction project, or the digging of a well or pond which might produce surplus clay soil. Get creative in where you look and who you talk to. Clay subsoil is incredibly common and is usually very easy to obtain.
Road construction projects often produce tons of excess clay subsoil
Sites like these may be a great place to look for clay soil if you don’t have any on your site.
What methods for testing and finding good soils have worked for you? Are there any important ones that I missed? Let me know in the comments below.
If you’d like to learn more easy regenerative skills each week, you can sign up to receive them directly to your inbox below.
If you found this article useful, consider sharing it with a friend who could benefit from the information or through your favorite social media platform below. I can’t wait to see how you apply this new skill in your own life!
Our current culture’s desire for new and innovative ways of doing everything has created many technological and lifestyle improvements, but as a result, many perfectly good and well suited technologies […]


Post comments
This post currently has no comments.