Wow, that sure happened fast. Just a couple weeks ago we were all going about our days like normal and now a whole lot of us are confined to our homes. All of a sudden our little apartments, condos, and houses, which were always small, sure seem a lot smaller now that we’re not getting outside. A lot of us are even avoiding any unnecessary trips to the grocery store or other routine tasks that got us out of the house to avoid the spread of this virus.
This lack of contact, space, and outside time is hard on everyone and is certainly unhealthy in the long run. I know I’ve been craving time out in nature, but what can we do when stuck in our little homes? In this article I’m going to share one of my favorite ways to grow food in tiny spaces, and while it’ll never replace the joy of getting out in a park and caring for a big garden, it’ll be sure to help you connect with nature in an intimate and important way. It’ll also allow you to grow nutritious food with no garden space at allWith any luck it’ll make this quarantine a little easier and help you get some essential nutrition in the process.
So let me introduce you to the wonderful world of sprouts and microgreens!
radishes burst from a sprouting tray
There are many great reasons to grow sprouts and microgreens in your own home. They’re fast and easy to grow, most being ready to eat between only 2 to 10 days! Especially in the case of sprouts, most mature in a week or less. You’ll never find such a quick harvest in a normal garden. The best news for people who don’t have yards or gardens or even much space in their homes is that it takes up very little room so it’s great for super small living spaces. You can even grow sprouts and microgreens all year long if you keep them indoors.
Growing your own food of any kind is also a great way to reduce your ecological footprint. Producing your own food eliminates transport miles, refrigeration, and single use packaging.
It’s also much cheaper to grow your own (a small container of sprouts costs $3 in stores around here). You can get a much wider variety by buying your own seeds too. Sprouts and microgreens also add great flavor to your food (I especially like radish sprouts for their fresh spice), and both are fantastic for your health.
Anyone can grow sprouts and microgreens. It’s especially fun for kids, and can be an easy way to introduce them to producing their own nutritious food. Personally, I’ve found that kids who’ve taken the time to grow their own veggies never put up a fight when it comes time to eat them.
Differences between sprouts and microgreens
Sprouts and microgreens are often confused, and for good reason. They’re pretty much the same thing with only a few key differences.
Sprouts are the first stage of the growth of a plant, right as it emerges from its seed. Many tiny transformations take place in this first stage which transform a seed and its chemical makeup. Before sprouting, a seed is designed to preserve itself and protect itself from damage until the conditions are correct for it to grow. It protects itself first with its outer layer which keeps the softer more sensitive insides from damage.
This is usually the hardest part of a seed to break down or digest. In some cases you have to discard the hulls or shells before you can germinate the seed.
Seeds that don’t have hard hulls or shells protect themselves with chemicals such as enzyme inhibitors, lectins, or phytic acid known as “antinutrients” which are designed to prevent them from being broken down or releasing their nutrients during digestion if they’re eaten so they can still sprout once they pass.
In most cases, as long as the seeds are not too cold or hot and they have adequate time to absorb water (during soaking or when the soil has enough moisture) these are the only conditions they need to “activate” and sprout.
Once they are activated, the anti nutrients give way to a whole list of vitamins, minerals, enzymes, and amino acids which are detailed in the health benefits section below. The amazing part about sprouts is that they can be grown without any soil or light because in the beginning all they need is water and moderate temperatures to start growing.
Microgreens are just like sprouts but are planted in soil and are harvested a little older. They are harvested after the first “true” leaves sprout but long before the plant begins to mature.
Unlike sprouts, the seeds are grown in soil or a growing medium and are placed in full sun or under a grow lamp to activate the small plants through photosynthesis. Because the roots of the plants are in soil or a growing medium, they are not for eating.
Instead, microgreens are cut at the base of the stem and only the stems and leaves are eaten. Microgreens also take just a little longer to mature. Usually between 1-2 weeks or when the first 4 leaves of the plant have emerged.
Because of the extra time and access to soil and sun, microgreens also have a noticeably higher amount of nutrition per calorie when compared to sprouts, especially in the form of fiber and chlorophyll.
And that’s it! That’s the only difference between the two.
Nutritional benefits of sprouts and microgreens
The first and most important health benefit to growing your own food from seed is that the process of sprouting breaks down harmful antinutrients in grains, nuts, beans, and lentils that make them difficult to digest.
Simply by soaking the seeds overnight, up to 90% of the antinutrients can be eliminated!
Sprouting is especially helpful for people who suffer from digestive and autoimmune diseases. I’ve suffered from digestive problems my entire adult life and it was a revelation to me when I learned how much better I could digest all kinds of foods just by soaking them, to say nothing of how much easier it is on my digestion once they sprout.
Have you ever had bad gas after eating beans? Of course you have, that’s what beans are known for and it’s the reason why so many people avoid them despite how nutritious and delicious they are. Luckily, the compound in beans that creates gas during digestion is broken down in the process of soaking and germination.
*For even better results, try adding a few tablespoons of vinegar, lemon juice, or whey to the soaking water to further break down the outer shell and reduce the cooking time.
By draining and rinsing your seeds, grains and beans for a few cycles after soaking, they’ll quickly begin to sprout. There are an estimated 100 times more beneficial enzymes in sprouts than in raw veggies.
They are also a great source of enzyme inducers that protect against chemical carcinogens, and hydrolytic enzymes which help the body assimilate and digest food. Sprouting also increases the vitamin and mineral content, especially B-vitamins, carotene and vitamin C.
Depending on the variety, they’re also a great source of proteins, antioxidants, and amino acids.
The only thing to be careful of with sprouts is that because they should be grown out of direct light and in humid conditions, they can also breed dangerous strains of bacteria if not properly washed, so take care to rinse them thoroughly with clean water and always wash sprouting containers to sterilize them before use.
If you feel there is still a risk of contamination due to any strange odors, you can also soak your mature sprouts in lemon water at a 1 to 6 ratio of lemon juice to water before eating.
The acid in the lemon juice will kill any bacteria quickly. As a last resort, you can also cook your sprouts at boiling temperatures to be 100% sure.
As well as having all the same health benefits as sprouts, microgreens also benefit from the nutrition they gain through photosynthesis as they convert the sun’s energy as well as the minerals in the soil into the nutrition that they need to grow. Because of this, microgreens have more fiber and chlorophyll along with the rest of the nutrients and enzymes that sprouts have.
According to Professor Qin Wang at the University of Maryland, microgreens are 4 to 40 fold more concentrated with nutrients by weight than mature versions of the same plants. His research team tested 25 different commercially grown microgreens, and found consistently high levels of important nutrients like vitamin C, vitamin E, vitamin K, lutein and beta-carotene.
The compromise is that they tend to take a little longer to grow than sprouts and need a few more materials. Microgreens also have less of a risk than sprouts of growing harmful bacteria because they are grown in open air and sunlight.
Sprouting before cooking grains, nuts, beans, and lentils
Sprouting isn’t just for eating fresh sprouts, there are also a ton of benefits to pre sprouting grains, nuts, beans and lentils before you cook them.
Even just pre soaking overnight can have a large effect in reducing the cooking time, eliminating anti-nutrients and increasing the available nutrition of these foods. Not all grains, nuts, or beans will sprout the way other seeds do by putting out root shoots and stems, but they have still “sprouted.”
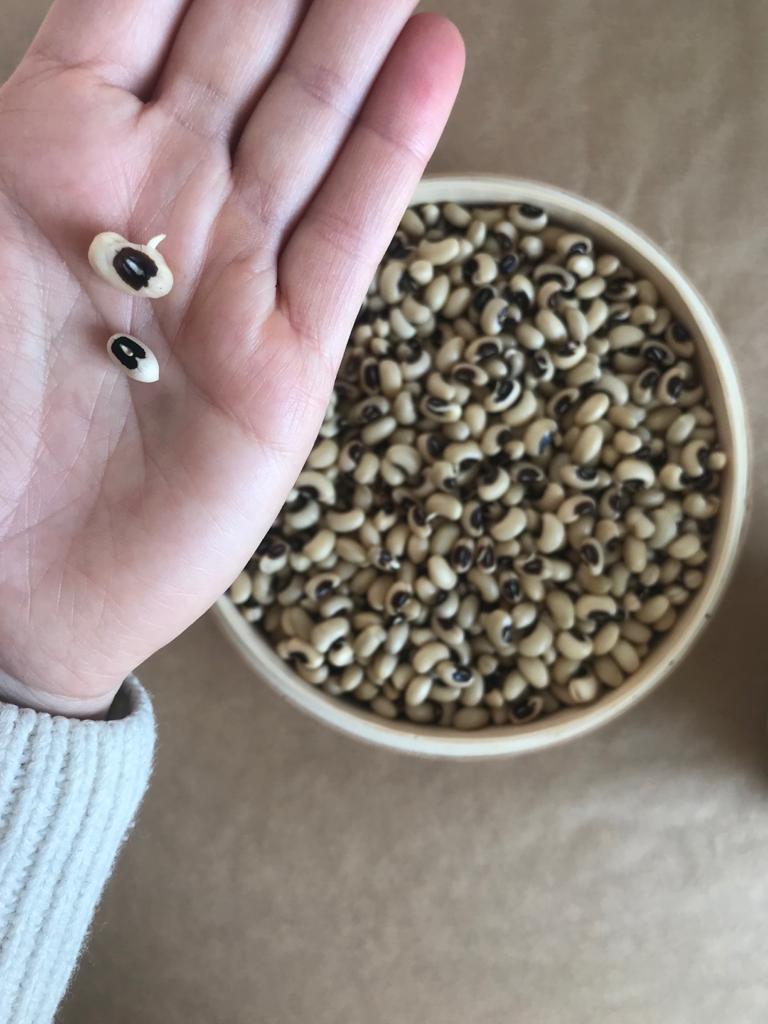
black eyed peas. One before soaking and the larger one after sprouting with a little root tail
Others, such as garbanzos, lentils and some grains will put out a little “tail” of a root when they’ve sprouted letting you know that they’re alive and healthy.
It usually takes a couple days of rinsing your grains, beans or lentils before this happens but at the very least you should soak them overnight before cooking.
How to grow your own sprouts at home
There are a few different options when it comes to growing sprouts at home.
Using jars or bags usually doesn’t require buying anything since many people have cloth or mesh bags and jars in their home.
There are many different sprouting kits that you can buy, all with their own features and advantages, it just depends on preference and how much you want to spend.
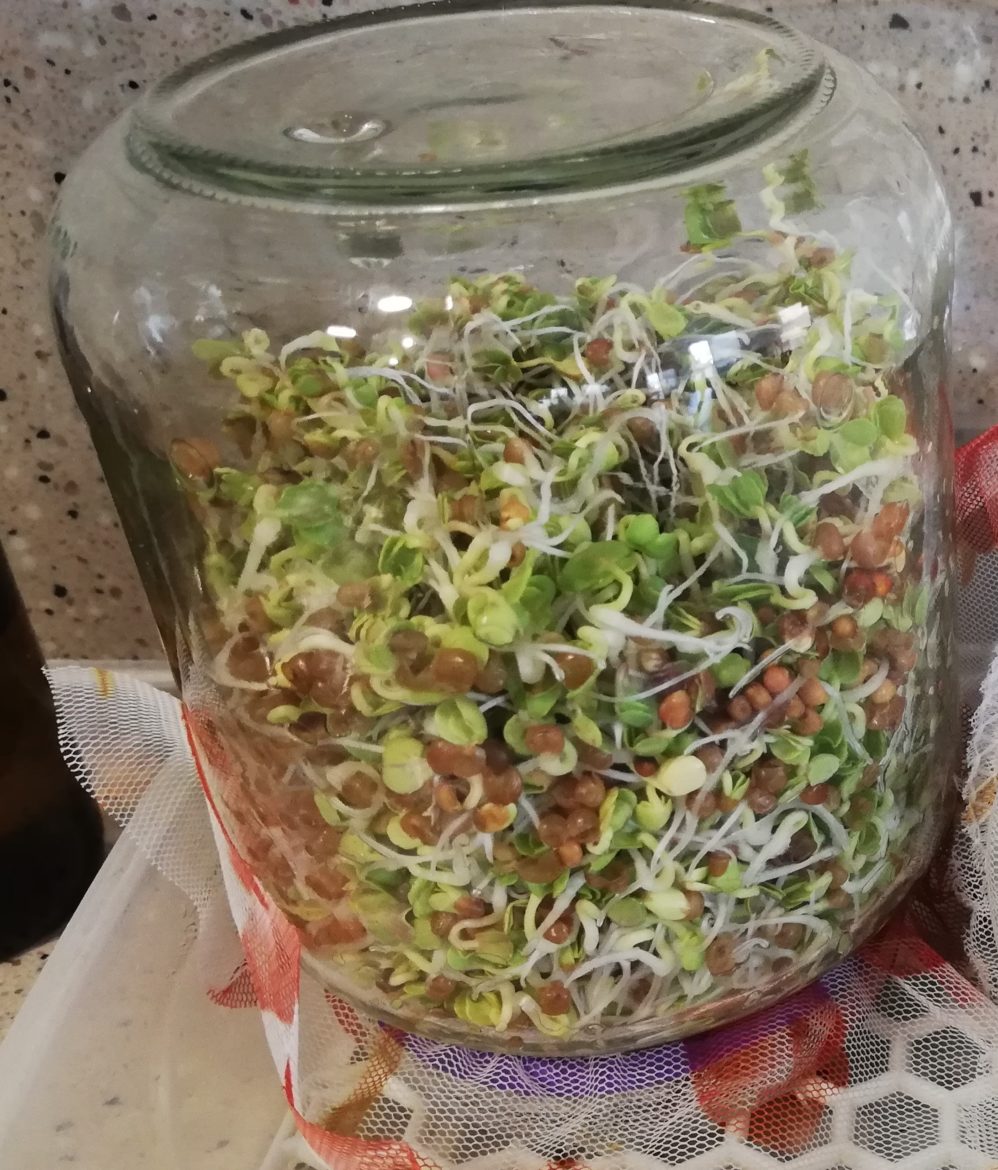
In Jars:
Soak seeds (see soaking times below).
Drain the water
Rinse clean once or twice a day with clean water and drain off all excess water to prevent mold
Keep out of direct light until harvest or until leaves begin to emerge
Give them a final rinse before saving in the refrigerator for later or eating right away
draining the water in the sprouts jar on a drying rack
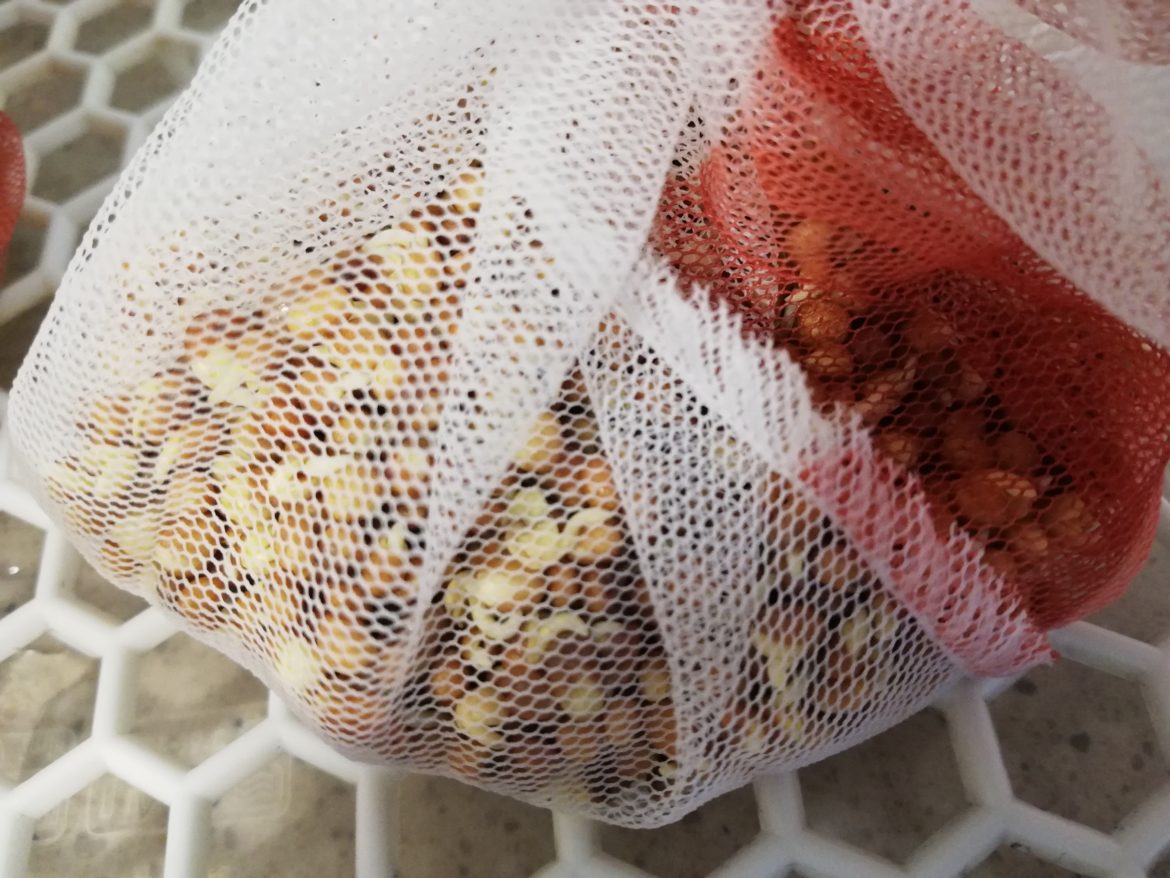
In sprouting bags:
Soak seeds (see soaking times below). Ideally with a tablespoon of vinegar or lemon/lime juice for best nutritional results
Drain the water (you can spin dry for faster and better results: see video)
Rinse clean once or twice a day with clean water and drain off all water
Keep out of direct light until harvest or until leaves begin to emerge
Final rinse before saving in the refrigerator for later or eating right away
In sprouting kits or trays:
Soak seeds (see soaking times below).
Drain the water
Spread the soaked seeds evenly over the tray so they aren’t stacked on top of eachother
Fill with water up to the level of the tray
Change with clean water at least once a day and cover with the top when done.
Keep out of direct light until harvest or until leaves begin to emerge
Final rinse before saving in the refrigerator for later or eating right away
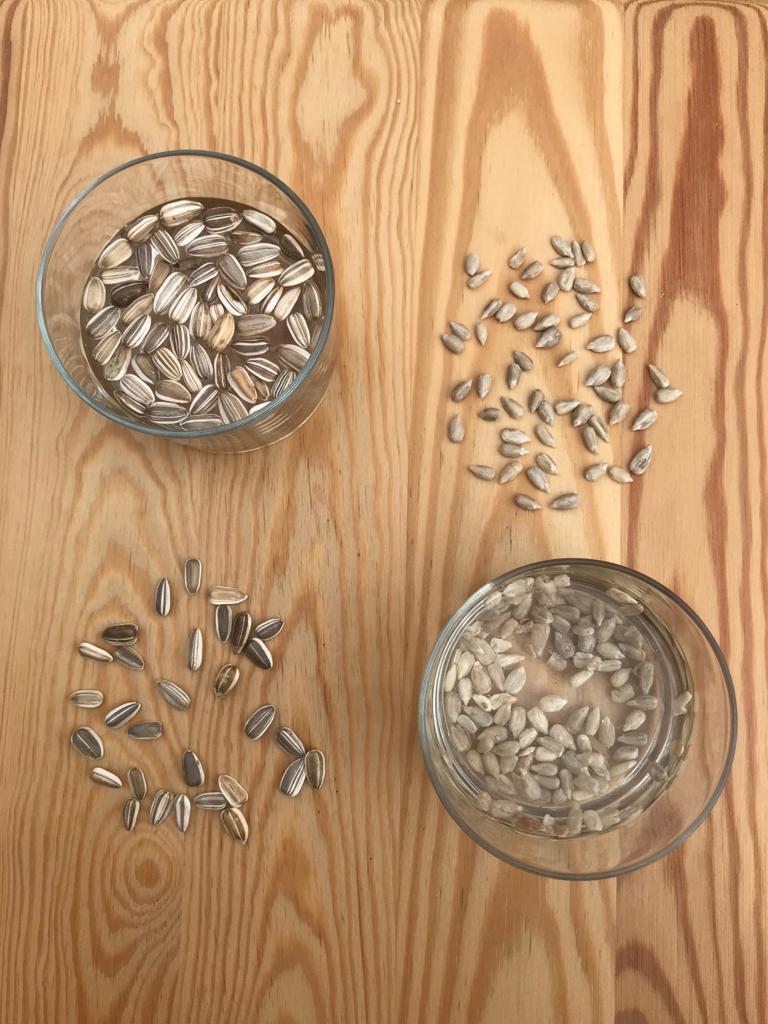
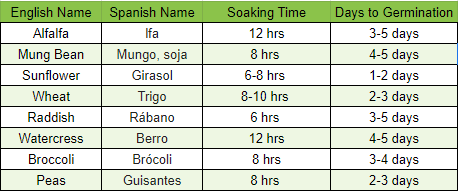
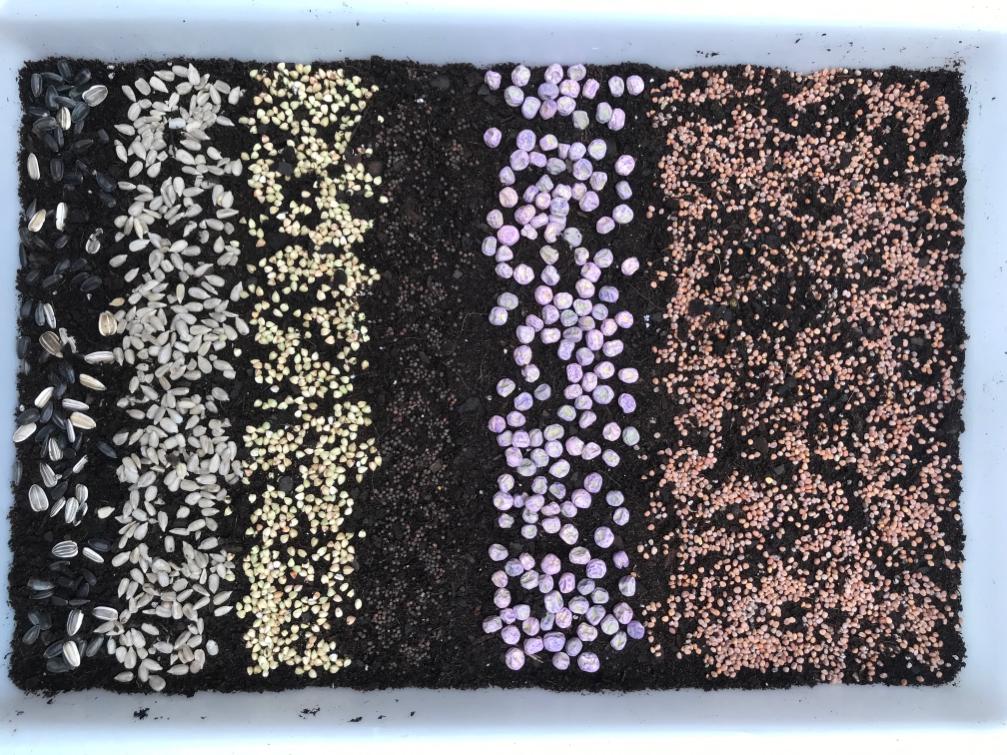
List of soaking times for common sprouting seeds and time to germination
you can’t go wrong with these
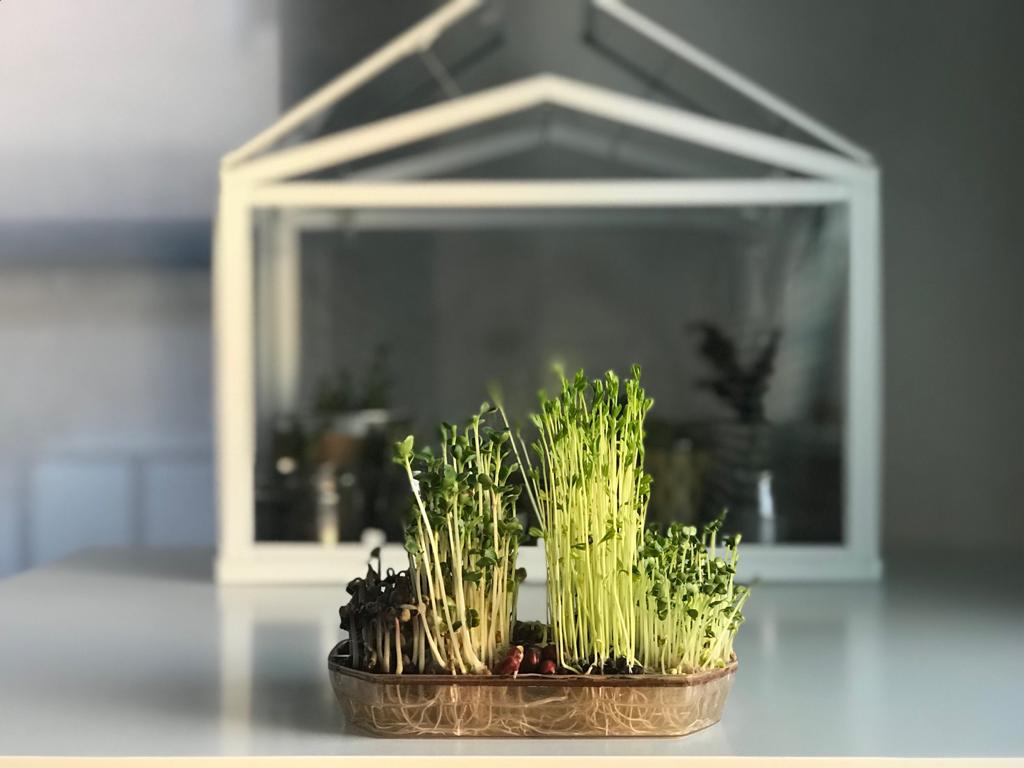
How to grow your own microgreens at home
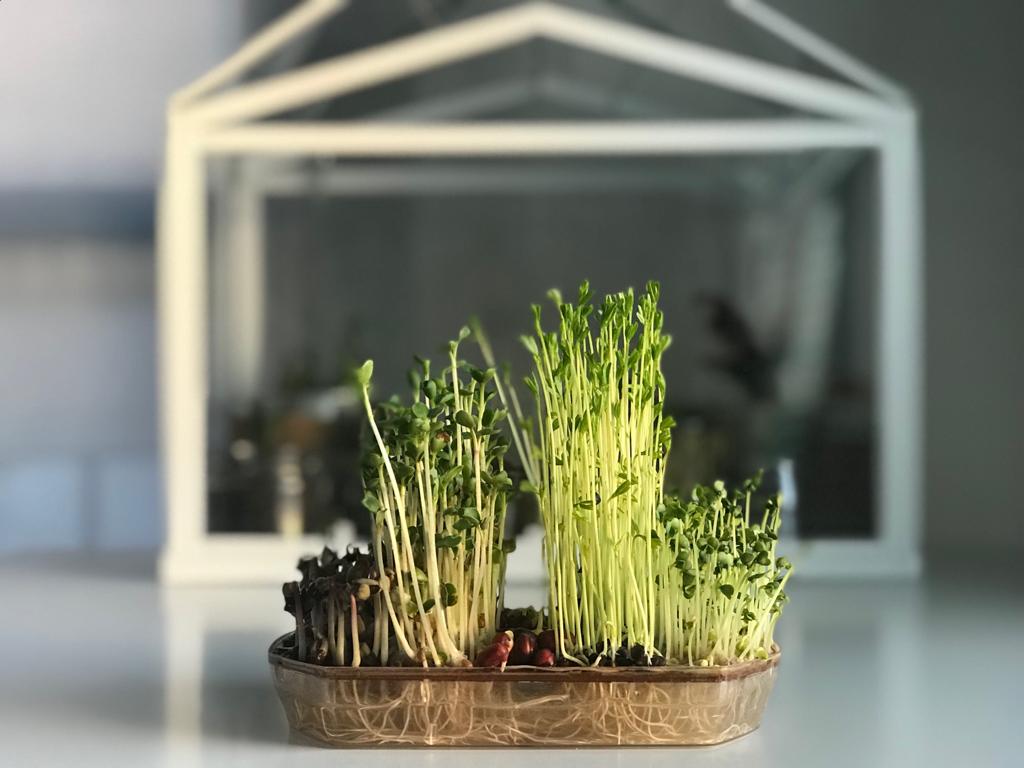
My growing tray at home with 6 different types of seeds to try out
Materials:
Planting tray 3-4 inches (7-10 cm) deep (or space in a garden),
potting soil,
spray bottle of water,
seeds,
sunny space or grow light.
Steps:
Fill your sprouting tray up to 1-1 ½ inches of potting soil and level the soil
Evenly scatter your seeds around the surface of the soil (you can pre soak the seeds to accelerate the germination time, but this also makes it much harder to evenly spread the seeds out over the soil
Cover the seeds with just a little more potting soil until none are showing
Mist water them with the spray bottle until the soil is moist (repeat this every day or a few times a day if needed. The soil should never completely dry out) Though you can certainly grow microgreens directly in garden beds, they are much more likely to dry out in hot conditions
Put the tray in a sunny window sill, out in a sunny patio, or under a grow light.
The amount of time needed before the seeds germinate will depend on the type of seed and whether or not you pre soaked the seeds, but they usually emerge in a few days and are ready to harvest between 2 and 4 weeks depending on the variety of seeds and the amount of light they receive.
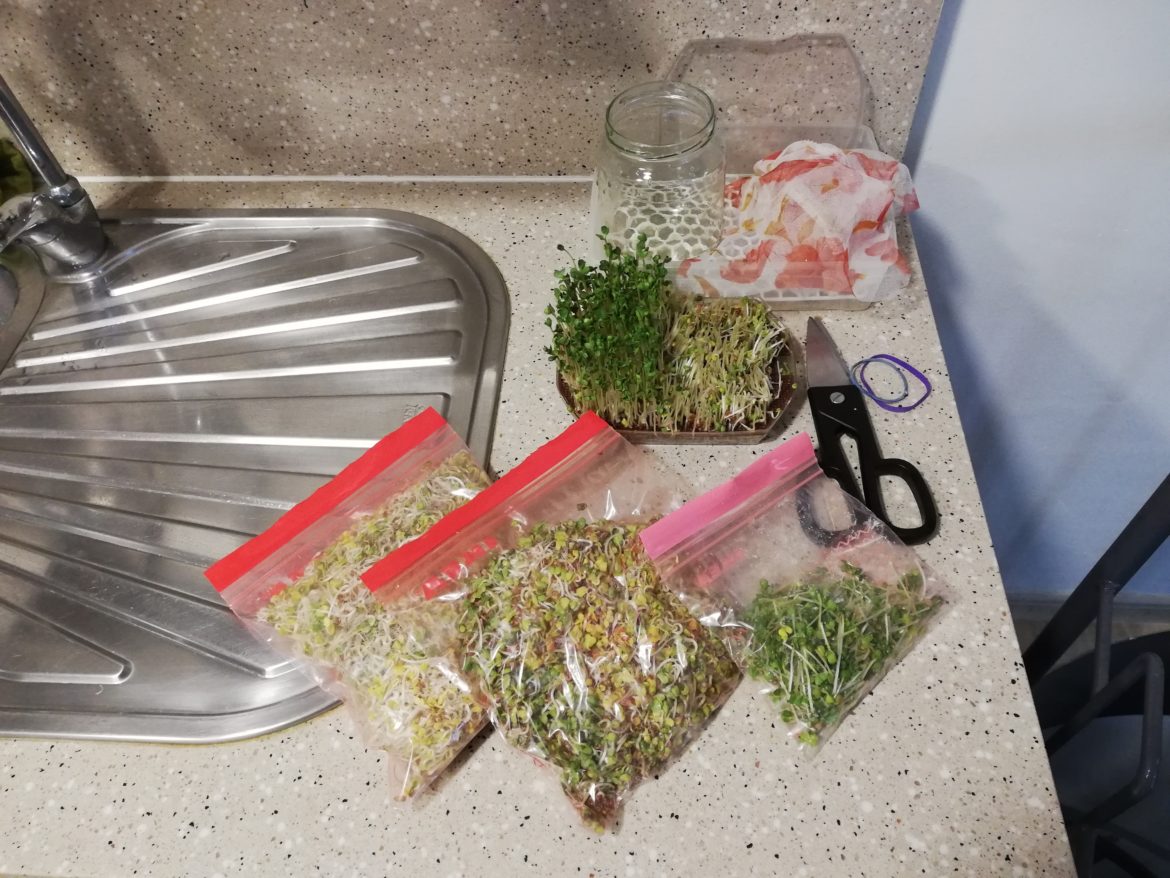
The simplest and fastest way to harvest your microgreens is with a sharp pair of clean scissors. Cut along the base of the shoots just above soil level. Some microgreens can even be harvested multiple times. Make sure to wash the cut greens and drain them well before storing them in a refrigerator for later. You can also eat them fresh or juice them right away.
Troubleshooting your sprouts
If they smell bad
Rinse thoroughly with clean water
Wash and sterilize the container
If they get mold
Compost the sprouts
Wash and sterilize the container
Start again
If they don’t sprout
Make sure your seeds aren’t too old. Many common vegetable seeds expire after a year
Make sure they are getting enough water. No water, no germination
Check to make sure they weren’t treated with anti-sprouting chemical or in any way cooked before you bought them. This is not a problem with organic seeds
If they get too cold/hot
If the sprouts have been frozen or cooked/burned in any way they will die. Best to compost them and start over
Ways to reduce the risk of bacteria in your sprouts
Soak in solution of water and lemon juice (1:6 ratio) before eating
cook
Troubleshooting your micro-greens
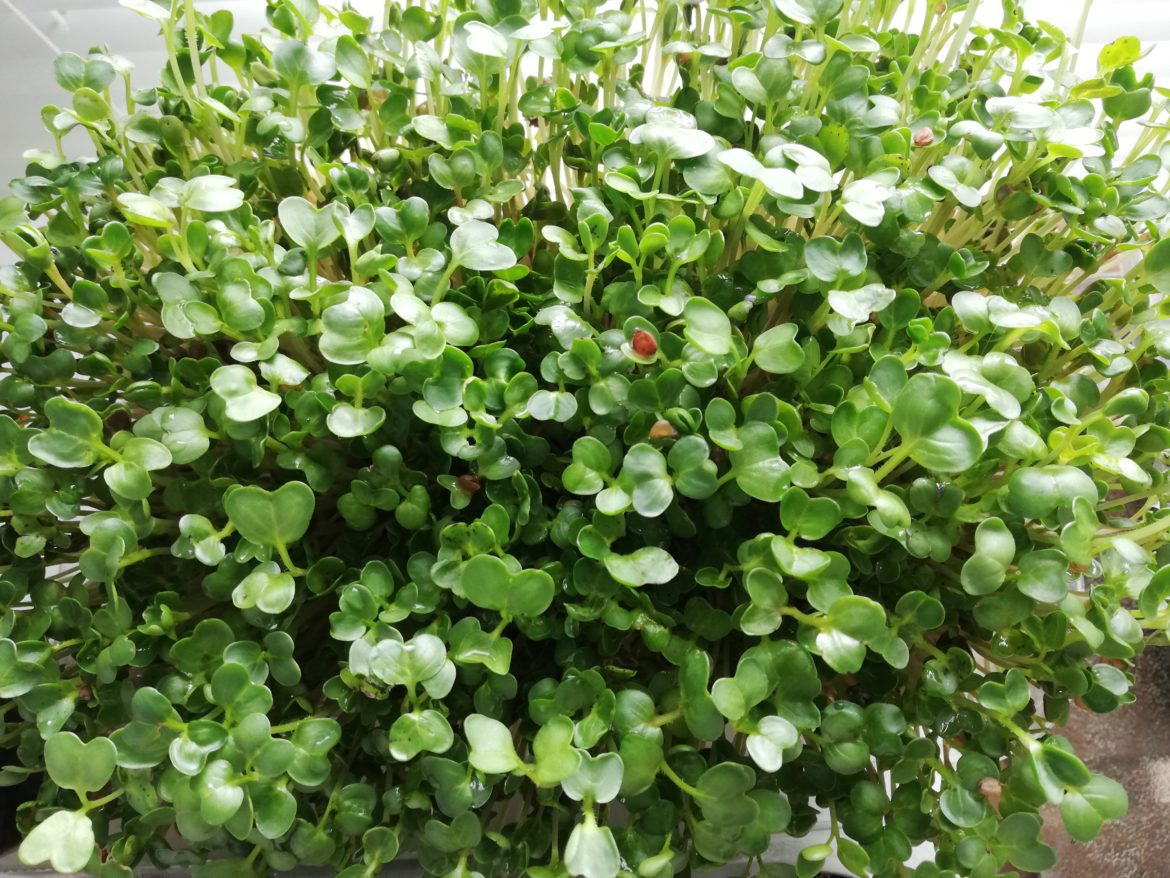
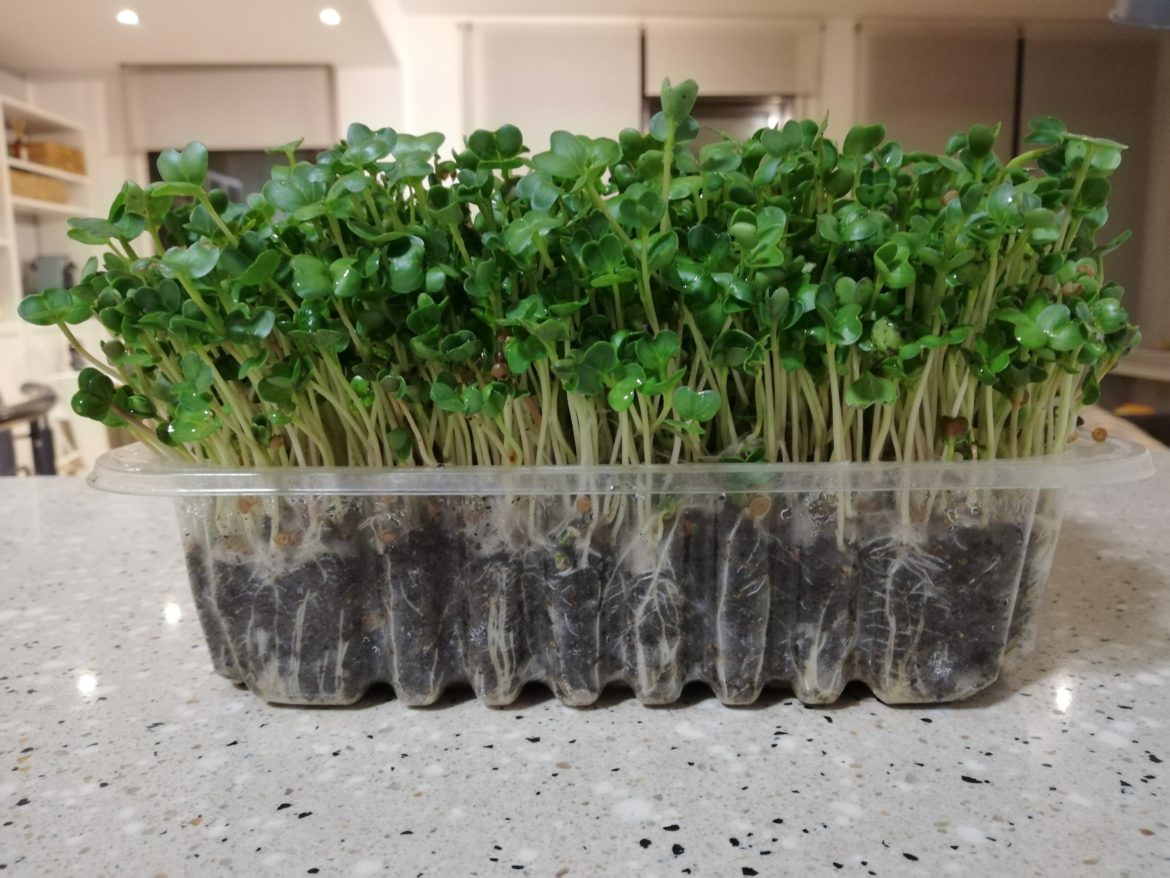
A small tray of radish microgreens after 5 days
Not sprouting
Make sure your seeds aren’t too old. Many common vegetable seeds expire after a year
Make sure they are getting enough water
Check to make sure they weren’t treated with anti-sprouting chemicals or in any way cooked before you bought them. This is not a problem with organic seeds
Spindly and not putting out leaves
Make sure they are getting enough sunlight. Microgreens are different from sprouts and they need at least 4-8 hours of sunlight to put out leaves.
Withering before maturation
Make sure they are getting enough water and are not drying out during the day from very strong sun/light exposure. If the sun is very hot and direct where they are, consider putting up a shade cloth to protect the delicate baby plants. You can also squash the plants if they are watered too heavily or are left out in heavy rain. This is why we recommend the spray bottle.
Mold
This is usually a cause of too much humidity and poor ventilation. Make sure there is good air exchange where you are keeping them. The ideal humidity level is 50%
In this article we covered:
The reasons to grow sprouts and microgreens at home.
They’re healthy and delicious
There are tons of environmental benefits to growing your own food
It takes up very little space so it’s ideal for people without a lot or any garden space
It requires very few materials to get started
It’s cheaper than buying them in the store
Anyone can do it. It’s super easy and quick
Similarities and differences between sprouts, microgreens, and soaking grains, nuts, beans, and legumes.
Soaking is the first step for almost all seeds (with a few exceptions, see table above), often even in the case of starting microgreens. This step alone can eliminate 90% of the anti-nutrients that inhibit good digestion and is a great thing to do before cooking grains, nuts, bean, and legumes even if you don’t intend to fully sprout them.
Sprouts are grown out of direct light and without any soil. All you need is a container and regular rinsing or watering. The whole plant is eaten in the case of sprouts. They are usually ready to eat within a week or less.
Microgreens are grown in soil and in full sunlight once the seeds have sprouted. They are harvested when the first “true” leaves emerge and are cut at the base of the stalk. Microgreens usually take 1-2 weeks to harvest depending on seed type
Both sprouts and microgreens are the first stage of the growth of a plant and have similar health benefits.
Main health benefits of sprouted foods
The sprouting process eliminates the anti-nutrients found in many seeds, grains, beans, and nuts
Sprouted food can have up to 40 times more nutrients by weight than their mature plant counterparts
Sprouted food has many enzymes that aid in the digestive process
Microgreens have the added benefit of fiber and chlorophyll
Sprouts and microgreens are just about the easiest way to grow your own fresh food anywhere, any time of year, with little required materials and in the shortest time to harvest. What they lack in bulk and calories they make up for in nutrient density. This is my favorite way to ensure that me and my partner get fresh, tasty, and healthy food, especially in the winter and without having to spend a lot on out-of-season veggies or expensive supplements. If you’re looking for a first simple step towards producing your own food or getting your kids excited about growing food, this is where I would recommend anyone to start. Get some seeds. Find, make, or buy some containers for sprouting or planting microgreens, and within a week or few you’ll have your first tasty little harvest. In both cases there’s a lot of room for experimentation and different varieties so you’ll never get bored either.
Let me know if you’ve found this article helpful by leaving a comment, a like, or by sharing this with a friend or family member who you think might enjoy it too. I’d love to see pictures of how yours turn out
Today’s guest, NIcholas Burtner, is a permaculture designer, consultant and educator through his organization The School of Permaculture. I caught Nicholas in a good moment for this interview because like […]


Post comments
This post currently has no comments.